Making a wooden shelf is a fun and satisfying project that lets you express your creativity while adding charm to your space. Start by choosing the right wood; pine's a great choice for beginners. Gather essential tools like a saw, drill, and sandpaper. Measure carefully to guarantee a perfect fit, and sketch your design to visualize the final look. Cut your wood, then sand it for a smooth finish. Assemble and securely install your shelf, then add your favorite books or decorations to make it uniquely yours. Curious about more tips and tricks? There's plenty more to discover along the way!
Design Highlights
- Select suitable wood based on durability and aesthetics; consider options like pine for affordability or oak for sturdiness.
- Measure and plan your shelf dimensions accurately, ensuring to account for the weight of items it will hold.
- Cut the wood carefully using a saw, following safety precautions and ensuring smooth, even strokes for clean edges.
- Assemble the shelf by securing brackets with a drill, ensuring everything is level and aligned for stability.
- Decorate the shelf with personal items, arranging them to create visual interest, and maintain it by dusting and checking for loose screws regularly.
Choosing the Right Wood
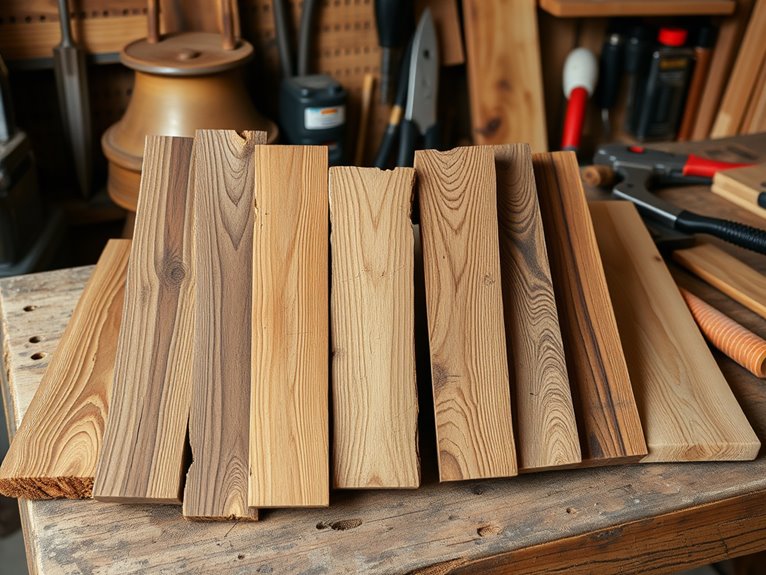
Choosing the right wood for your DIY shelf can make all the difference in both durability and aesthetics. When you're selecting wood, reflect on what you want your shelf to achieve. Are you going for a rustic look or something sleek and modern? Different woods offer unique grains and colors, so let your style shine through.
Pine's a popular choice for beginners; it's affordable and easy to work with. If you're after something sturdier, oak or maple can provide that strong foundation you need. Plus, these hardwoods have beautiful patterns that catch the eye. Incorporating high-quality wood ensures longevity and maintains the visual appeal of your shelf. Consider using natural materials to enhance the rustic decor vibe and create a cozy atmosphere. Additionally, using stunning shelf decor can elevate the overall aesthetic of your newly built shelf, making it a focal point in your kitchen.
Don't forget to take into account the weight your shelf will carry. Lighter woods like poplar work well for smaller items, while heavier woods are great for books or decor. Imagine how satisfying it'll be to see your shelf not only look good but also hold up over time!
Lastly, think about finishing touches. Staining or painting your wood can bring it to life. What colors resonate with you? By choosing the right wood, you're not just building a shelf; you're creating a piece that reflects your personality and enhances your space! Additionally, consider using weather-resistant options to ensure your shelf withstands various outdoor elements if you plan to place it on a balcony.
Essential Tools and Materials
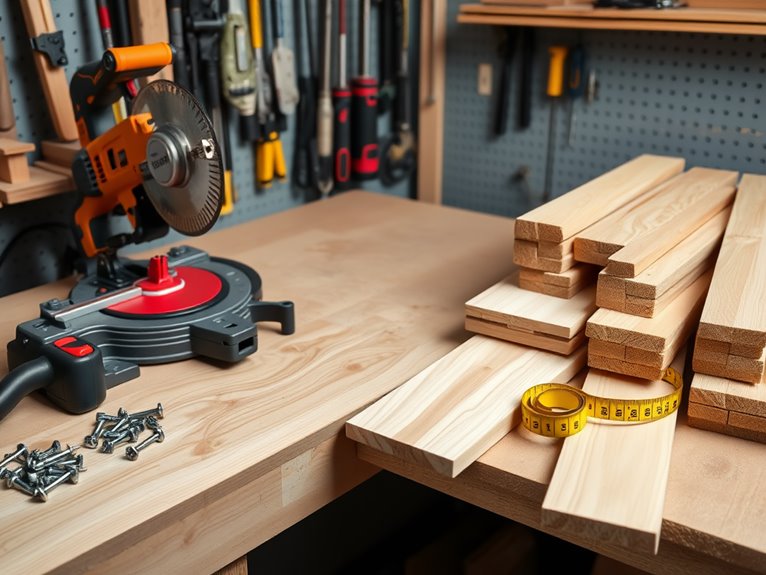
When starting on your DIY shelf project, you'll often find that having the right tools and materials makes all the difference.
First, you'll need a sturdy set of tools. A drill, saw, and measuring tape are essential. A level is also important to guarantee your shelf is straight; nobody wants a wobbly shelf! To enhance your shelf decor, consider using seasonal elements that reflect the changing seasons and add warmth to your space. Incorporating warm hues in your decor can further evoke the beauty of autumn and can also be inspired by trending colors for summer decor that foster a revitalizing atmosphere.
Next, gather your materials. Quality wood is significant, and you'll want to choose something that suits your style, like pine for a rustic feel or oak for something more elegant. Opt for solid wood and metal materials that provide rustic charm and durability. Additionally, incorporating high-quality printing on labels can enhance the aesthetic appeal of your shelf.
Don't forget screws or brackets, which will provide the support your shelf needs.
Additionally, grab some sandpaper to smooth out rough edges and a good wood finish to protect your project and enhance its beauty. You might also want a paintbrush for applying that finish.
Finally, safety gear like goggles and gloves is a must. After all, you want to enjoy this project without any mishaps!
With these tools and materials in hand, you're ready to plunge into the exciting world of DIY shelving. So roll up your sleeves, and let's get started!
Measuring and Planning

Having a clear plan and accurate measurements is essential for a successful DIY shelf project. First, think about where you want your shelf to go. Is it for books, plants, or decorative items? Consider adding pastel-colored decorative elements to enhance the aesthetic of your shelf. Incorporating seasonal motifs can also create an inviting atmosphere for your space. Additionally, choosing decor items that fit on shelves, tables, or mantels for flexible placement options can further enhance your shelf's functionality. To make your shelf truly stand out, consider using summer shelf decor ideas that reflect the season's vibrant colors.
Measuring the space is your next step. Grab a tape measure and jot down the width, height, and depth of the area. Don't forget to account for any obstacles, like outlets or furniture!
Next, consider how long and wide you want your shelf to be. Will it span the wall or be a snug fit? Sketch a simple design. Visualizing your shelf can make a difference.
Also, think about the weight of the items you'll place on it. This impacts the type of wood and brackets you'll need. Are you going for a rustic vibe or a sleek modern look? Incorporating color palette coordination can enhance the overall aesthetic of your newly crafted shelf.
Lastly, double-check your measurements; they should be precise. Remember, "measure twice, cut once" is more than just a saying. It's your ticket to a great-looking shelf!
Cutting the Wood

Cutting the wood for your DIY shelf is an essential step that sets the foundation for your project. You'll want to gather your materials, including a saw, measuring tape, and a sturdy work surface.
First, double-check your measurements from the planning stage—this guarantees everything fits just right. After all, who wants a shelf that's too short or too long?
When you're ready, secure your wood firmly on your work surface. If you're using a handsaw, take your time; smooth, even strokes will give you a cleaner cut. If you have a power saw, follow safety precautions closely. Choosing high-quality materials ensures your shelf will withstand seasonal changes and maintain its appeal. Additionally, using durable construction methods will enhance the longevity of your shelf. Incorporating rustic wooden shelves into your design can also create a warm, inviting atmosphere in your space. Using tiered trays can further optimize your shelf layout for aesthetic and functional purposes.
Remember, a little patience goes a long way, and your future self will thank you for it! Incorporating premium wood into your project will enhance the durability and aesthetic appeal of your shelf.
As you cut, visualize how your shelf will look once it's all put together. Feel the excitement build! Each cut brings you closer to creating a beautiful piece for your space.
Don't rush the process—great things take time. And if you make a mistake, don't fret! It's all part of the journey. Embrace the learning experience and keep going. You're doing amazing!
Sanding and Finishing
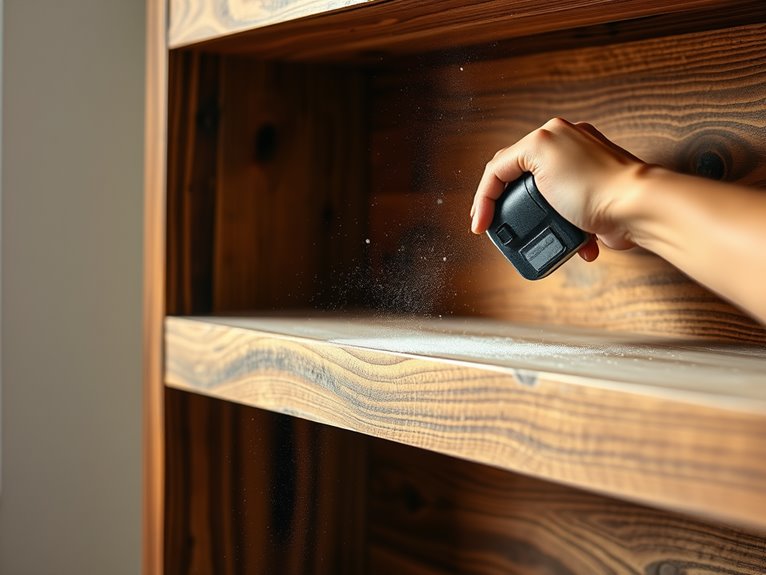
Once you've made your cuts, the next step is sanding and finishing your wood to achieve a smooth, professional look. This part is essential because it not only enhances the appearance but also protects your shelf from damage. Adding stylish decor items can also elevate the overall aesthetic of your winter pantry, especially when using durable materials that withstand holiday activities. Incorporating natural wood will ensure your shelf has both beauty and longevity. To further enhance the ambiance of your laundry room, consider adding cozy winter decor that complements your shelf design.
You'll want to take your time here; a little patience goes a long way!
Start by grabbing some sandpaper. Use a coarse grit to smooth out rough edges, then switch to a finer grit for a polished finish.
Make sure to sand with the grain of the wood to avoid scratches. You'll feel the difference as you go!
Once you're satisfied with the smoothness, it's time to apply a finish. Here are three options to think about:
- Wood Stain: It adds color while highlighting the wood's natural grain.
- Sealer: This protects against moisture and wear, perfect for a functional shelf.
- Polyurethane: It offers a durable, glossy finish that looks amazing. Additionally, using moisture-resistant items can further enhance the durability of your shelf in humid environments.
Assembling the Shelf

Before you plunge into assembling your shelf, gather all your materials and tools to guarantee a smooth process. You'll need your pre-cut wood pieces, screws, brackets, a drill, and a level. Having everything at hand makes the task easier and more enjoyable.
Start by laying out your wood pieces on a clean surface. Visualize how your shelf will come together and double-check that you've got the right orientation. It helps to have a clear plan!
Next, take your time aligning the pieces. You want those corners snug and secure. Use the drill to attach the brackets to the sides of the shelf, ensuring they're level.
Don't rush through this part; it's where your craftsmanship shines! Once the brackets are in place, attach the top shelf using screws. Give everything a gentle shake to test stability. Remember, you're building something that'll hold your favorite books or cherished knickknacks. Choosing durable materials like wood for decor can enhance both the aesthetic and functionality of your shelf.
Are you feeling the excitement? Each step you take is a step closer to your finished shelf. So, roll up your sleeves and enjoy the process. You're not just assembling wood; you're creating a piece of your home!
Installing the Shelf
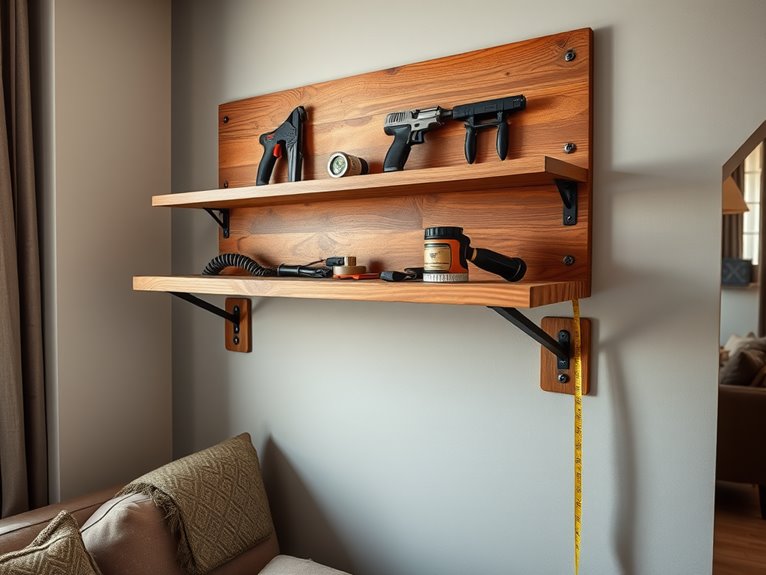
Now that your shelf is assembled and stable, it's time to install it securely on the wall. This step is essential, as a well-mounted shelf not only enhances your space but also guarantees safety. Grab your tools and let's get started!
- Choose the Right Location: Find a spot that's both functional and visually appealing. Make certain it's at a comfortable height for you and doesn't interfere with other furniture.
- Locate the Studs: Use a stud finder to locate the wall studs. Mounting your shelf on studs provides better support than using drywall anchors alone.
- Mark and Drill: Once you've found your studs, mark where you'll drill the holes. Drill pilot holes to make it easier to insert screws, and then secure the brackets firmly into place.
After installation, give your shelf a good shake to verify it's stable.
Feeling that solidness? That's what you want!
Now you're ready for the fun part—filling it with your favorite items. Enjoy the satisfaction of your hard work, and remember, every shelf tells a story!
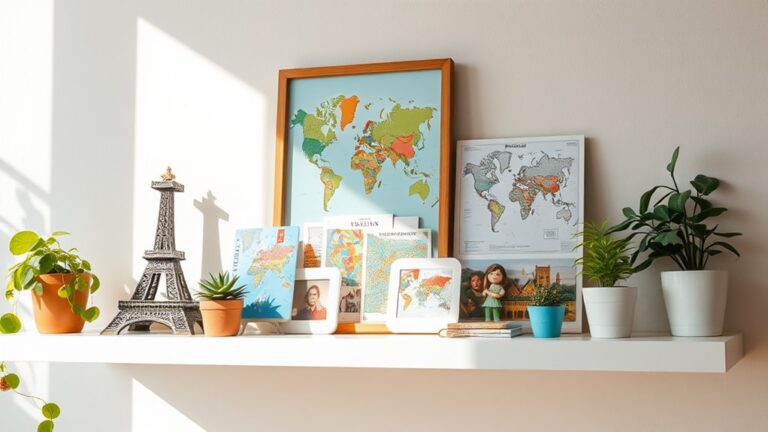
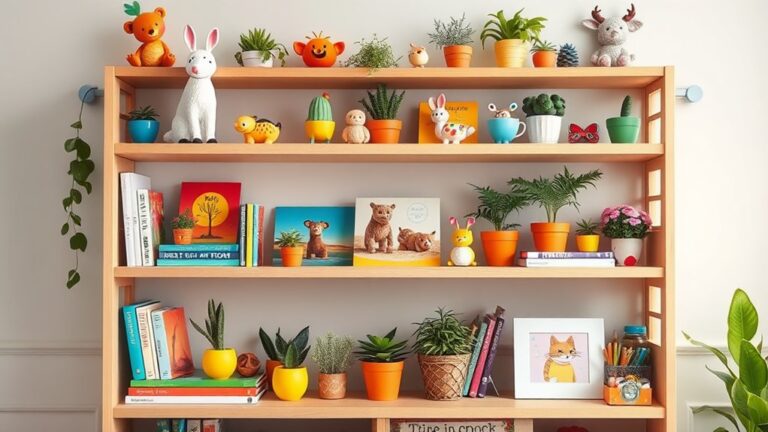
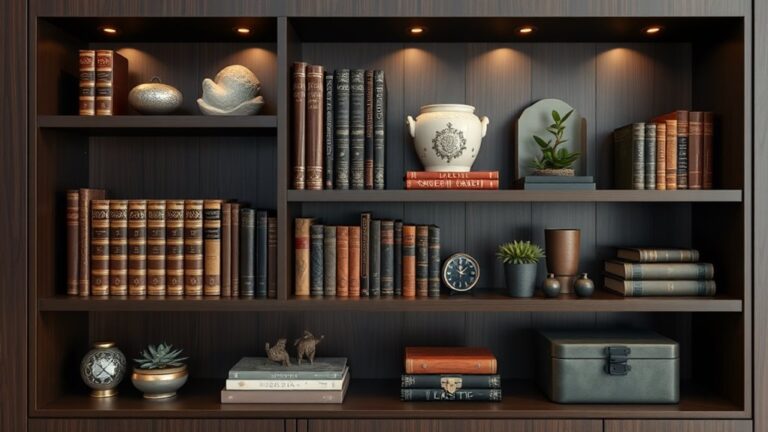
Decorating Your Shelf

A beautifully decorated shelf can transform a simple space into a personalized showcase. Think about what you love—books, plants, or travel souvenirs. Start by selecting a few key pieces that reflect your personality. Arrange them in a way that feels balanced but not too rigid.
Layering is essential; place taller items at the back and shorter ones in front. This creates depth and draws the eye in. Don't shy away from mixing textures! A smooth ceramic vase next to a rough wooden box adds interest.
Incorporate greenery. Adding a plant can breathe life into your shelf, making it feel vibrant. Have you considered using framed photos? They add a personal touch and spark fond memories.
Remember, it's your shelf, so have fun with it! Experiment with colors and shapes, and don't hesitate to change things up if something doesn't feel right. You might even consider seasonal decor to keep it fresh and exciting.
As you step back and admire your handiwork, you'll see how your shelf tells your story, inviting others to engage with your unique style.
Maintenance Tips

Keeping your shelf looking great requires regular maintenance. You want it to be a proud showcase of your hard work, right? A little care goes a long way in guaranteeing your shelf remains a beautiful part of your home.
Here are some easy maintenance tips to keep it in top shape:
- Dust Regularly: Use a soft cloth or duster weekly to wipe away dust. This not only keeps it clean but also prevents buildup that can scratch the surface.
- Check for Stability: Periodically inspect the shelf for any loose screws or wobbling. Tightening screws or brackets guarantees it stays sturdy and can hold your cherished items safely.
- Avoid Excess Moisture: Keep drinks or plants that might spill away from the shelf. If moisture gets on the wood, it can warp or damage the finish.
Taking these simple steps will help you keep your shelf looking fresh and inviting. Imagine impressing your friends with a shelf that shines!
Frequently Asked Questions
What Type of Wood Is Best for Heavy Items?
When you're planning to store heavy items, consider using hardwoods like oak or maple. They're incredibly strong and durable, making them perfect for supporting weight.
Pine might be tempting due to its lower cost, but it's softer and can sag over time.
Have you thought about your project's style? Choosing the right wood not only guarantees strength but also adds beauty to your space.
How Much Weight Can the Shelf Hold?
When considering how much weight your shelf can hold, think about the materials and design you're using.
Generally, a well-constructed wooden shelf can support anywhere from 50 to 100 pounds, depending on its size and the type of wood.
Have you thought about reinforcing it with brackets or choosing sturdier wood?
By planning carefully, you can create a beautiful, functional shelf that safely holds your treasured items without worry.
Let's get building!
Can I Paint Over Stained Wood?
Absolutely, you can paint over stained wood!
Just make sure to prep the surface first. Lightly sand it to help the paint stick better, then wipe away any dust.
Applying a primer can also work wonders, especially on darker stains.
Once you've done that, you're ready to add your favorite color!
Isn't it exciting to transform your space? With a little effort, you can create something that truly reflects your style!
How Do I Fix a Wobbly Shelf?
You've got a wobbly shelf that's driving you a bit crazy, right? Picture it swaying like a tree in the wind!
First, check the brackets and screws; they might just need tightening. If it's still rocking, consider adding a support underneath or adjusting its position on the wall.
Sometimes, a little shim can work wonders. With a few simple tweaks, you'll have a sturdy shelf that stands proud and strong! Isn't that satisfying?
What Are Some Creative Shelf Designs?
When you think about creative shelf designs, imagine shelves that truly reflect your personality!
How about a zigzag pattern for a fun twist?
Or, consider floating shelves that give a sleek look while saving space.
You could even use reclaimed wood for a rustic vibe.
If you're feeling adventurous, why not try a geometric shape?
Each design can tell a story, so let your imagination run wild and create something uniquely yours!
Conclusion
You've got this! Building a shelf out of wood may seem intimidating, but it's a rewarding project that adds character to your space. Even if you're new to woodworking, following these steps will help you create something beautiful and functional. Think about all the memories you can showcase on your shelf! So grab your tools, release your creativity, and get started. You'll be amazed at what you can achieve with just a little effort and enthusiasm!